

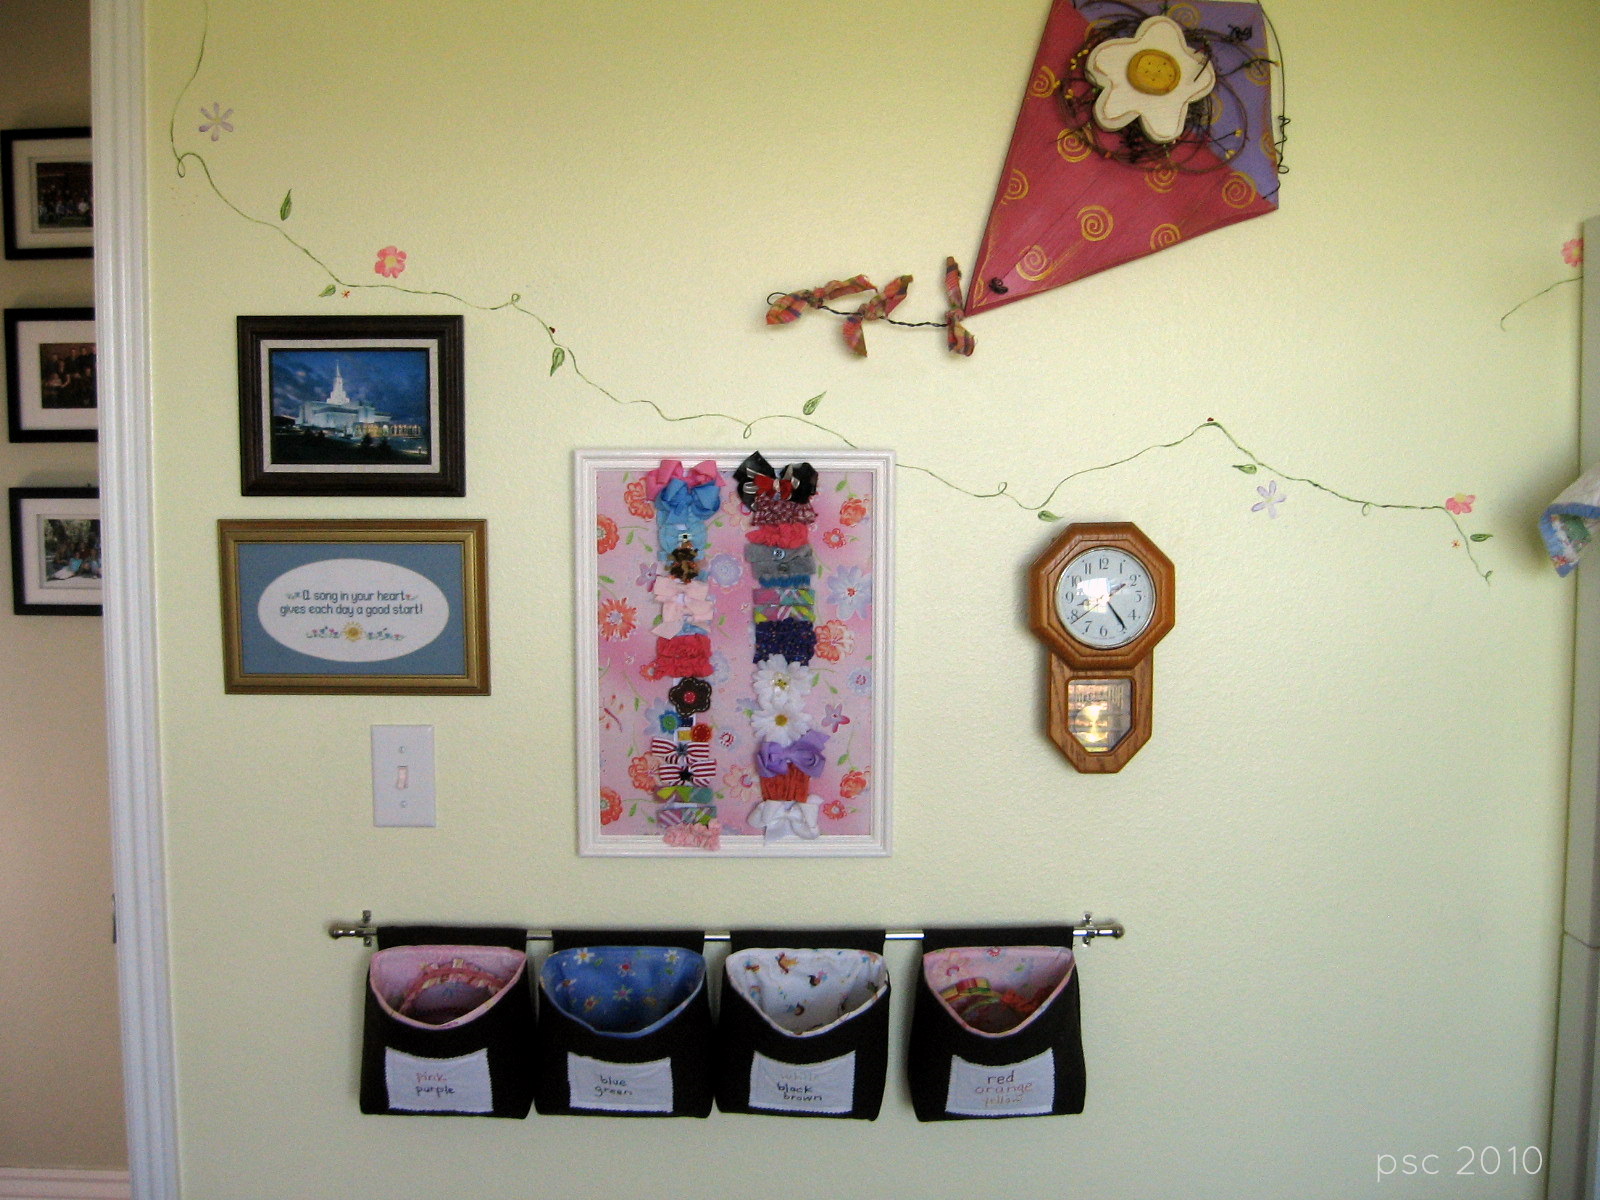
So, I divided and conquered. For all the clippies, I made a framed organizer. I didn't have a specific tutorial I followed. For the remaining ribbons and headbands, I used the hanging basket tutorial from The Mother Huddle.
I found this frame at our local thrift store. It was the perfect size, and I could reuse almost everything. I had a twinge of guilt removing and throwing away the embroidery, so here is a photo to preserve it in cyberspace:


I removed all but the backing board, and then primed and painted the frame.

I cut batting about 0.25" bigger than the board, and my chosen fabric about 2" bigger than the board with my pinking shears. (Thank you, Michaels, for having your Gingher pinking shears on clearance for $9.99!)

I then glued the fabric to the back. I used hot glue for quick hold, and tacky glue for a more permanent one.

I attached two ribbons equal distances from the center to hold the clippies.

After the glue was dry, I decoupaged scrapbook paper to the back to cover all the folded fabric.

When everything was dry, I fit it to the frame, securing with some glue.

For my hanging baskets, I made fabric labels to organize by color.

I made them with the same method I used for my Toddler Quiet Toy. I measured where I wanted them to be on the front of the pockets, adhered with some heat n bond lite, and sewed them to the outer fabric before assembling. One change I made, rather than interface both the outer and lining fabric, I used fusible fleece to strengthen the outer fabric, and did not interface the inner. I love how sturdy they are. One tip, if you choose to do the same, be sure to trim down the fleece about 0.5" from the tops, so you don't have as much bulk to fold down.

Here are my finished baskets close up:


I spent a total of $6 for this project. I used scraps and materials I had on hand, and only had to purchase the thrift store frame and cafe rod. My girls are having fun picking what to hair accessories to wear that matches their outfit.
And the best part, our drawer now looks like this:

We've also been going through other scary drawers, closets, and other places prone to clutter. It has been very liberating.

UPDATE: I was asked to share my favorite tips on saving money on craft supplies at FaveCrafts Blog. You can see all the answers HERE.
Linked up with A Few of My Favorite Things, Just a Girl, Tatertots and Jello, Kojo Designs, Creative Jewish Mom, Under The Table and Dreaming, The Girl Creative, and Skip to My Lou.
Featured on Tatertots and Jello!
Destri added more the tutorial I used for the hanging buckets. You can see the whole post HERE. She even referenced my version. Thank you!


18 happy thoughts:
Beautiful!!!!! I need to get started on our house to get ready for school. TFS!!
awesome! I cannot wait to do the same. thanks for the wonderful idea!
I love your fabric baskets!
Love these ideas, especially the frame! Thanks for sharing :)
Looks great! I love the baskets, they are so creative. And the frame is so handy too. Great job.
nice job! I like the hanging baskets, and the embroidered colors-great touch!
great job! love your ideas. No girls here but me and mine are a big, hot mess in a basket in the masterbath. lol
What a great idea! Thanks so much for sharing on FTF!
What a great idea! I might have to do this with my own messy drawer. Thanks for sharing!
I love how organized it is now! Looks great!
I have never seen anything like this...very creative and useful-can't beat that!
The hanging accessory baskets are such a great idea, thanks for sharing!
http://thecraftinme.blogspot.com
Fantastic job! I love the hanging baskets and want to make some as well, but just haven't found the right place/function yet.
Sweet! I've been meaning to make a clip holder similar to that. You've inspired me...!
I love those hanging baskets. Love. I must do something like that. So pretty - well done!
Yes, I know, that hair stuff drawer! Good for you that you conquered it in such a creative way! Great to see you and thanks for sharing on Craft Schooling Sunday! all the best!
saw your link over at The Mother Huddle!!! awesome ideas!! I like the color names on the front... i think I'll do that for my scrapbook and craft stuff!!!!
Love it! thanks for sharing your ideas!
Julia
www.workwifemomlife.com
I also followed The Mother Huddle tut and saw your link there. Love the fabric labels...might "upgrade" mine soon!
http://purplepinkpig.blogspot.com/2012/08/get-mail-organized-hanging-fabric.html
Post a Comment
How sweet of you to stop by. Kind words are always welcome.