Welcome to Part 3 of my Little Mama Series: Dolly pillowcases.
To begin, you'll need the following:
- Pillow to be covered
- Fat quarter of your fabric
- Matching thread
- Scraps of ricrac or thin fabric strips
- Sewing supplies (including scissors, pins, sewing machine, seam ripper, measuring tape, and iron)
- Helpful to have: rotary cutter and quilting ruler.
When my mom made the original bedding for our doll crib, she made a mattress and two pillows. For some reason, the mattress shrank... but the pillows were still usable. I wanted to make some pillowcases to cover them and have them match the new bedding.
Step One. Measure your pillows and cut your fabric.
These pillows measure 7.5" by 5". I made the mistake of not cutting enough extra length to make a big cuff, so here are my recommendations for cutting to include a proper cuff:
I also cut two trimming pieces of that special blue floral fabric featured in the bumpers. I cut this fabric 1.25" wide, and as long as the width of my pillowcases...for this example that would be 12 inches long. For each pillowcase you'll need one rectangle and one trim strip. You could also get a similar look with ricrac.
Step two. Attaching the trim.
Determine where you want the trim to be on your pillowcase. Iron the fabric strip in half, and pin where you'd like it to be. I measured in 5 inches from the edge. Be careful to keep it in a straight line.
Step three. Construct the pillowcase, using French seams.
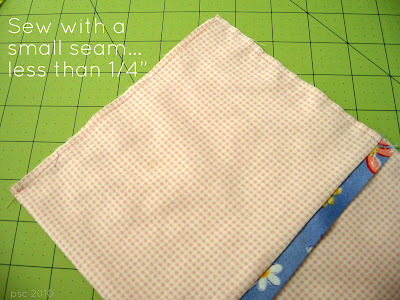
Fold the pillowcases in half so the long sides match, wrong sides together.
This is important because it will reduce the bulk of the corner...especially since we are using French seams.
You want to use a larger seam allowance for the second seam so that the raw edges don't show through.
Step Four. Finish the cuff and topstitch.
Since I didn't make the rectangle long enough, I had to make a small rolled hem for my pillowcases. Follow the same directions, just making a bigger cuff. Match the edge of your cuff to your decorative strip.
Since I goofed, I just made a rolled hem, and stitch 1/8" from the edge.
I also topstitched the strip to keep everything in place.
All done! Ready to keep those dollies comfy in their crib.
Stay tuned for the final installment on Thursday...making the dolly quilt.
Linking up to Sugar Bee Craft Edition, Today's Creative Blog, Women Who Do It All, and Someday Crafts.
Check out the other parts of this series:


0 happy thoughts:
Post a Comment
How sweet of you to stop by. Kind words are always welcome.