Want to make a fun quiet activity toy for your toddler? Here's the how to. I have to give a thank you to two of my inspirations in making this toy. First, Anna at
Noodlehead taught me how to use zippers with her amazing
gathered clutch tutorial. Second, Cally at
Calico does the coolest stuff where she embroiders labels like this
makeup bag. They are wonderful muses.
You'll need larger scraps of 4 colors, plus extra scrap pieces for decorative touches, plus matching thread. You'll also want black embroidery floss, an 8" blue zipper, 2 5/8" black buttons, a small metal grommet, and 6" of 1/4" grosgrain ribbon, some scraps of heat n bond lite, and about 1/2 yard of medium weight interfacing. You'll need your regular sewing tools, cutting tools, and of course, your seam ripper. Plus, have your iron and ironing board handy. If you've got them, pinking shears are handy too. Be sure to print out your
templates for the triangle pouch and star.
For the
square pouch cut out the following pieces (notions are also included):
- Two 9" squares of outer blue fabric, I used denim
- Two 9" squares of inner blue fabric
- Two 1.5" by 2.5" squares of outer blue fabric for zipper tabs
- Two 2" by 4" white pieces for label
- Nine 1.5" squares, 3 of each color
- One 8" zipper in blue
- Two 9" squares of interfacing
For the
round pouch, cut out:
- Four 8.25" circles of red fabric, two for the outer, two for the inner
- One 6" circle of second red fabric
- One 3.5" circle of the third red fabric
- Two 3" by 1.25" white pieces for label
- 3 metal gripper snaps
- Two 8.25" circles of interfacing
For the
triangle pouch, cut out:
- Four 6.5" triangles, two from outer fabric, two from lining
- Two 2.5" by 2.5" squares for button tabs
- Two 3" by 1.25" white pieces for label
- 2 black buttons
- Two 6.5" triangles of interfacing
For the
star:
- Two stars from a gold/yellow colored fabric
- One star of batting remnant
- Two stars of interfacing
- Two 1.75" by 1.25" white pieces for label
- One small grommet
- 6" piece of grosgrain ribbon
The hardest part is gathering and cutting all the pieces, I promise.
Assembling the square pouch===All seams are 1/4".
Apply the interfacing to both outer squares.
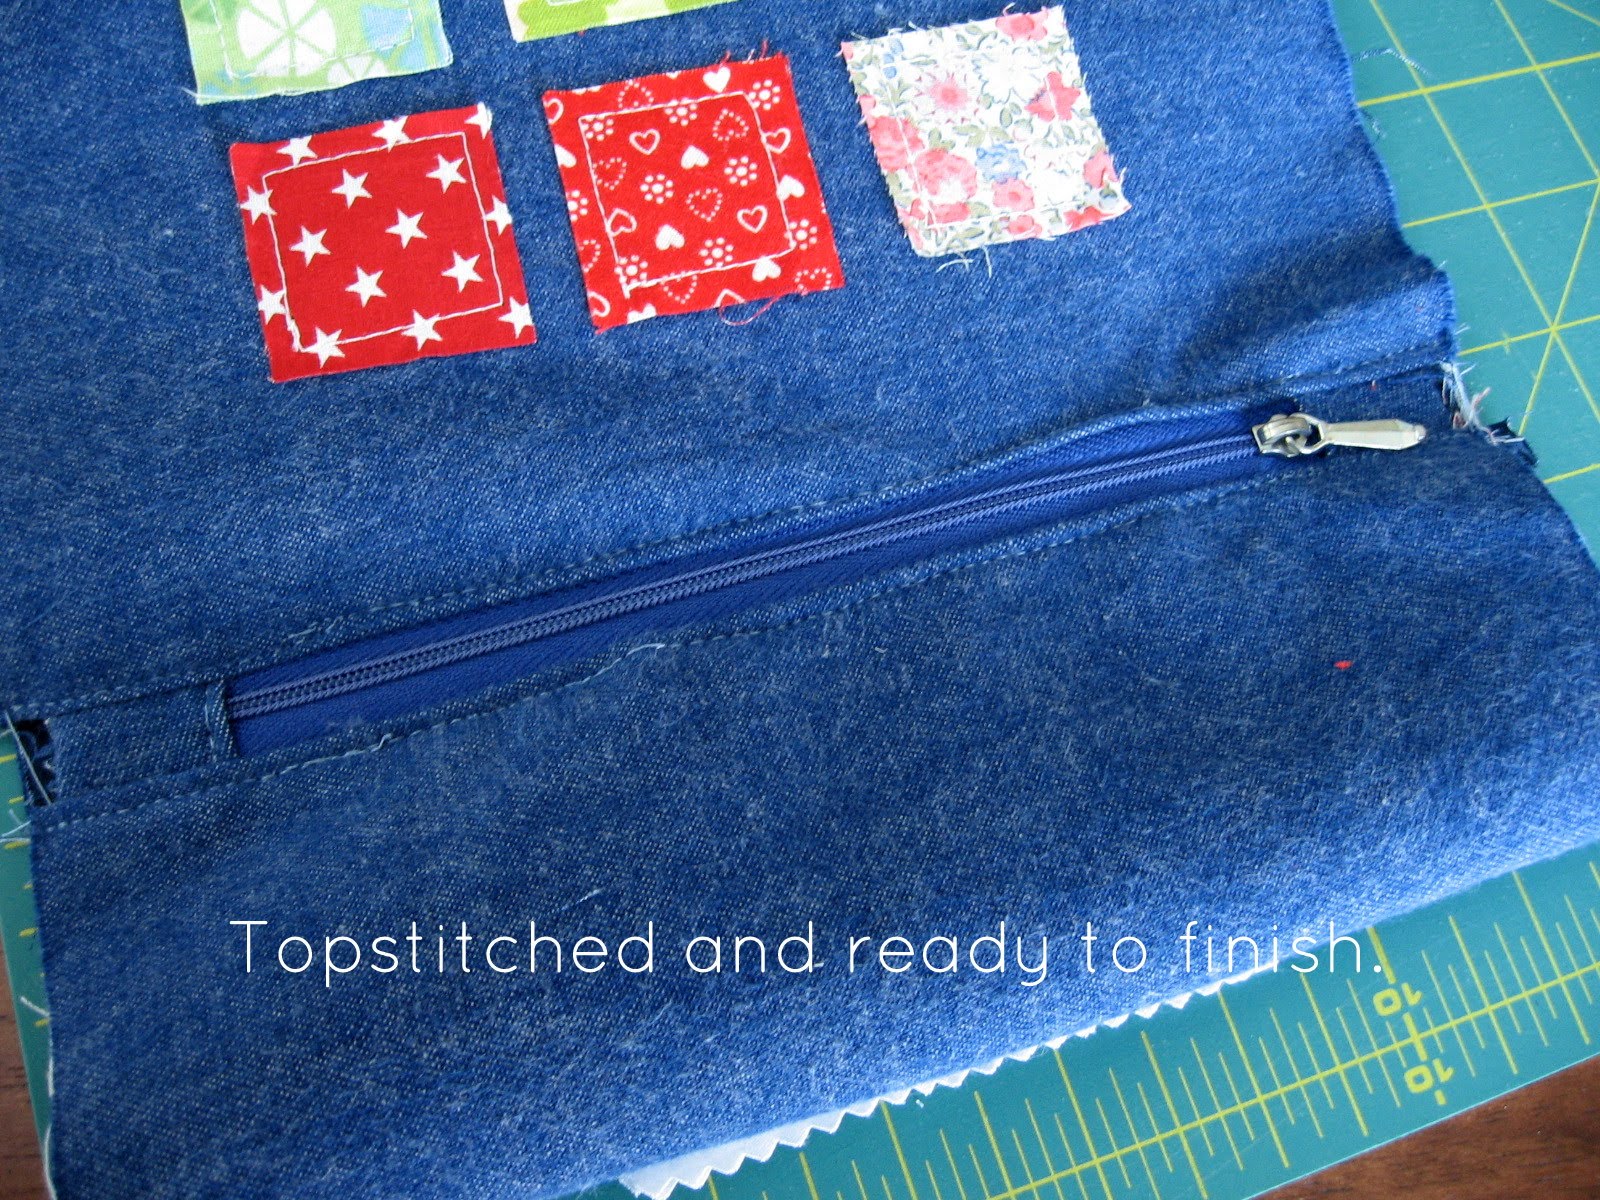
Prepare the outer decorations. One side will have the "square" label, the other will have the 9 colored counting squares.
Embroider your square label. I just wrote out the word in lower case, and used the black embroidery thread in a running stitch.
Now ready the zipper. Take the small tabs, and iron as shown.
Pin the tabs to each end of the zipper.
Sew the tabs to the zipper 1/8" from edge, being careful not to hit any metal parts.
Ready to put it all together?
Using your zipper foot, sew these two pieces together. You may need to leave your needle in the fabric, lift your presser foot and move the zipper as you go to keep the seam even.
Repeat for other side of the zipper. Replace your zipper foot with your regular foot, then topstitch along each side of the zipper.
Open the zipper half way, and then open up your pouch so that the right sides of the outer and inner parts are right sides together.
Be sure to leave a 3-4 inch opening in the lining so you can turn everything right side out. Sew around all the edges. Clip the corners, and turn right side out.
Before you put the lining back in the bag, fold in the opening to match the surrounding seams. Pin and sew closed.
Assembling the round pouch.
I'm really excited about this one...it was a little tricky to figure out how to make a round lined pouch...and now you can too!
Prepare your outer side pieces, following the same steps as for the square. Begin by interfacing the outer pieces. Then apply the appliques.
The appliques for this pouch are simpler, and include two more circles applied with heat n bond lite, and then zigzag stitched onto one piece.
To assemble, put the outer circles right sides together, making sure you identify the "top"...or where the circle label is in the right spot.
Sew the outer circles together, being sure the leave a large opening.
IMPORTANT...leave a second opening in the lining, smaller than the top opening. You'll need this for turning everything at the end.
Once the pouch is turned, make sure all the seams are pulled out all the way. Just like on the square lining, pin the opening closed and stitch.
Tuck the lining back into the pouch, and topstitch.
Almost finished. Now, following the manufacturer's directions, apply 3 gripper snaps to the opening.
Assemble the triangle pouch.
This gets easier as they get smaller. Interface the outer pieces, and apply the triangle label as with the other pouches. This is the only applique.
To make the button tabs, begin by adding a little interfacing.
Fold in half, and you're ready to sew down each side, leaving the short side open.
When finished, turn right side out, and press. Topstitch around the edges.
Mark your button hole placement and sew your button holes.
Next, pin the tabs to the blank triangle side, and baste into place.
You're getting close.
Sew the two sides, and then repeat for the lining...making sure to leave another small opening for turning.
Trim the fabric around both the outer triangle and lining, and then turn the lining right side out. Tuck the lining into the outer triangle.
Just as with the other pouches, turn right side out.
Tuck the lining back inside the pouch.
Topstitch around the opening of the triangle pouch.
Lastly,
assemble the star.
This is the easy peasy part. After cutting all your pieces, interface and label as before. Next, stack, all 3 layers together and pin.
I actually sewed the edge twice for fun. Ready for a decorative grommet. Just follow the package instructions, or if you have one, use an applicator tool.
Press it hard, and then you'll have this:
And you're done! You've made a fun teaching toy that will keep a little one entertained in lots of places where they need to be quiet. At least that's the hope.
This project was created for
SYTYC Session 3 Science theme.
Featured on
Craft Gossip,
One Pretty Thing, and
Totally Tutorials!
Linking to
Super Stinky Boys,
Delicious Ambiguity,
Today's Creative Blog,
Someday Crafts,
Women Who Do It All,
Just a Girl,
House of Hepworths,


8 happy thoughts:
Thank you so much for posting this tutorial. I am hoping to get one made for my daughter. We are always in need of quiet toys!!
Looks awesome! Very thorough tut too! I've been wanting to do something like this for my son...looks like I may need to head to the fabric store! Thanks for linking up to Mad Skills Monday!
Ginger
SSB
Very cool! I love it.
Wow! So much detail! And I must admire how neat your workspace is. Thanks for linking up! Come again!
Thanks for linking up to Tot Tuesdays! This is a super cool idea! I’ll be featuring you this week. Feel free to grab my featured button under the “buttons” category in my menu bar. Have a great week!
LOVE this! What an awesome idea!
I need to get on the ball with my sewing and make this. What a great tutorial!!!
Oh how I wish I had the time to make something like this! I know my guys would love it! Awesome!
Post a Comment
How sweet of you to stop by. Kind words are always welcome.