I am so excited to share this tutorial with you. My two younger kids needed Easter baskets. I wanted something that would be easy to store, with a little personality. I started with some sketches on our trip to Arizona, and finally had time yesterday to put together the pattern. They are simple to make, and include fun details like piping or ruffles, and are fully lined. To personalize them even more, I used my
Modern Letters to add a monogram, and designed a simple egg applique. You can find the templates needed to make this basket
HERE.
UPDATE: A second place to download docs if you have any trouble is
HERE.
To begin, gather your materials. You'll need 3/4 yard of two fabrics, one for the outer basket, one for the liner.
(This will actually be enough fabric for two baskets, but you need the length.) You'll also need 25" of contrasting piping or ruffled fabric. If you want to add the applique, you'll need heat n bond lite, and scraps of black, white and other colored fabrics. Of course, you'll want your scissors, seam ripper, and sewing machine. Have your iron handy for pressing seams.
All seams will be sewn at 1/4".
Let's begin. Print your
templates (or
HERE). Cut out your pattern pieces.
You should have, one bottom piece of each fabric, one 8" by 19.5" piece of each fabric, and a 3" by 17" piece of fabric for the handle.
Let's start sewing. First, sew together your basket side pieces. With right sides together, sew the liner sides together on the 8" long side. Repeat for the outer basket side. This will create two tubes of fabric.
If you are using piping, a straight basting stitch is just fine.
Make sure the seam of the side piece is centered on one of the long portions of the bottom. This will be the back of your basket.
Both the lining and the outer should be sewed to their respective bottom pieces. Now, you'll want to topstitch the outer basket bottom to give the bottom some more strength.
Now, set each basket piece aside for a moment, and prepare your handle.
Open up the handle fabric piece.
The handle is complete. Grab the outer basket piece. Fold the outer basket so that the oval bottom is straight.
The basting stitch should be at less than 1/4" so it doesn't show in the final product.
Be sure to mark a 3" opening for turning your basket right side out.
Be sure to fold in the opening (about 1/4") so that the sides match all the way around.
Fabric basket with ruffled edge.
Fabric basket with piping.
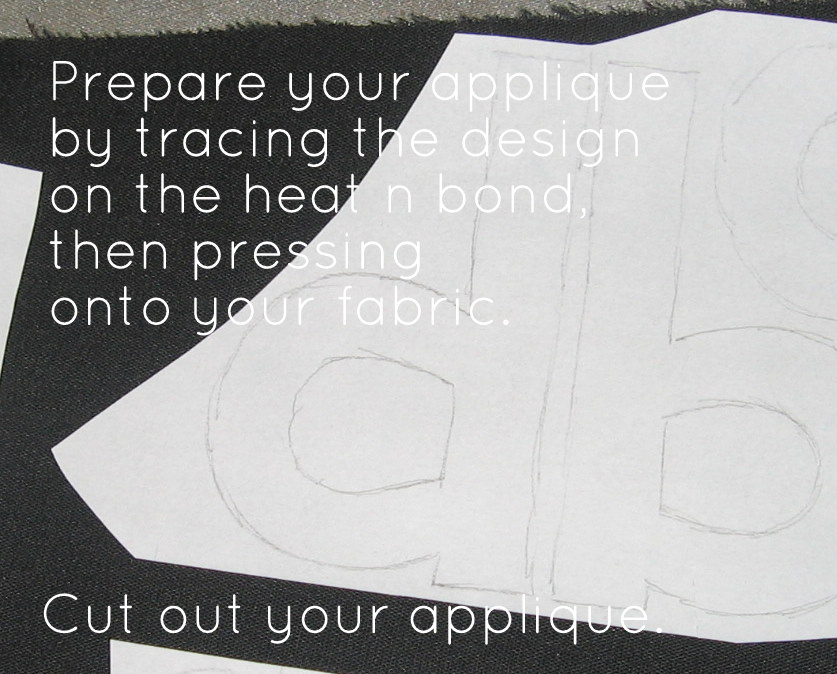
You can stop here, if you wish, or proceed with the applique.
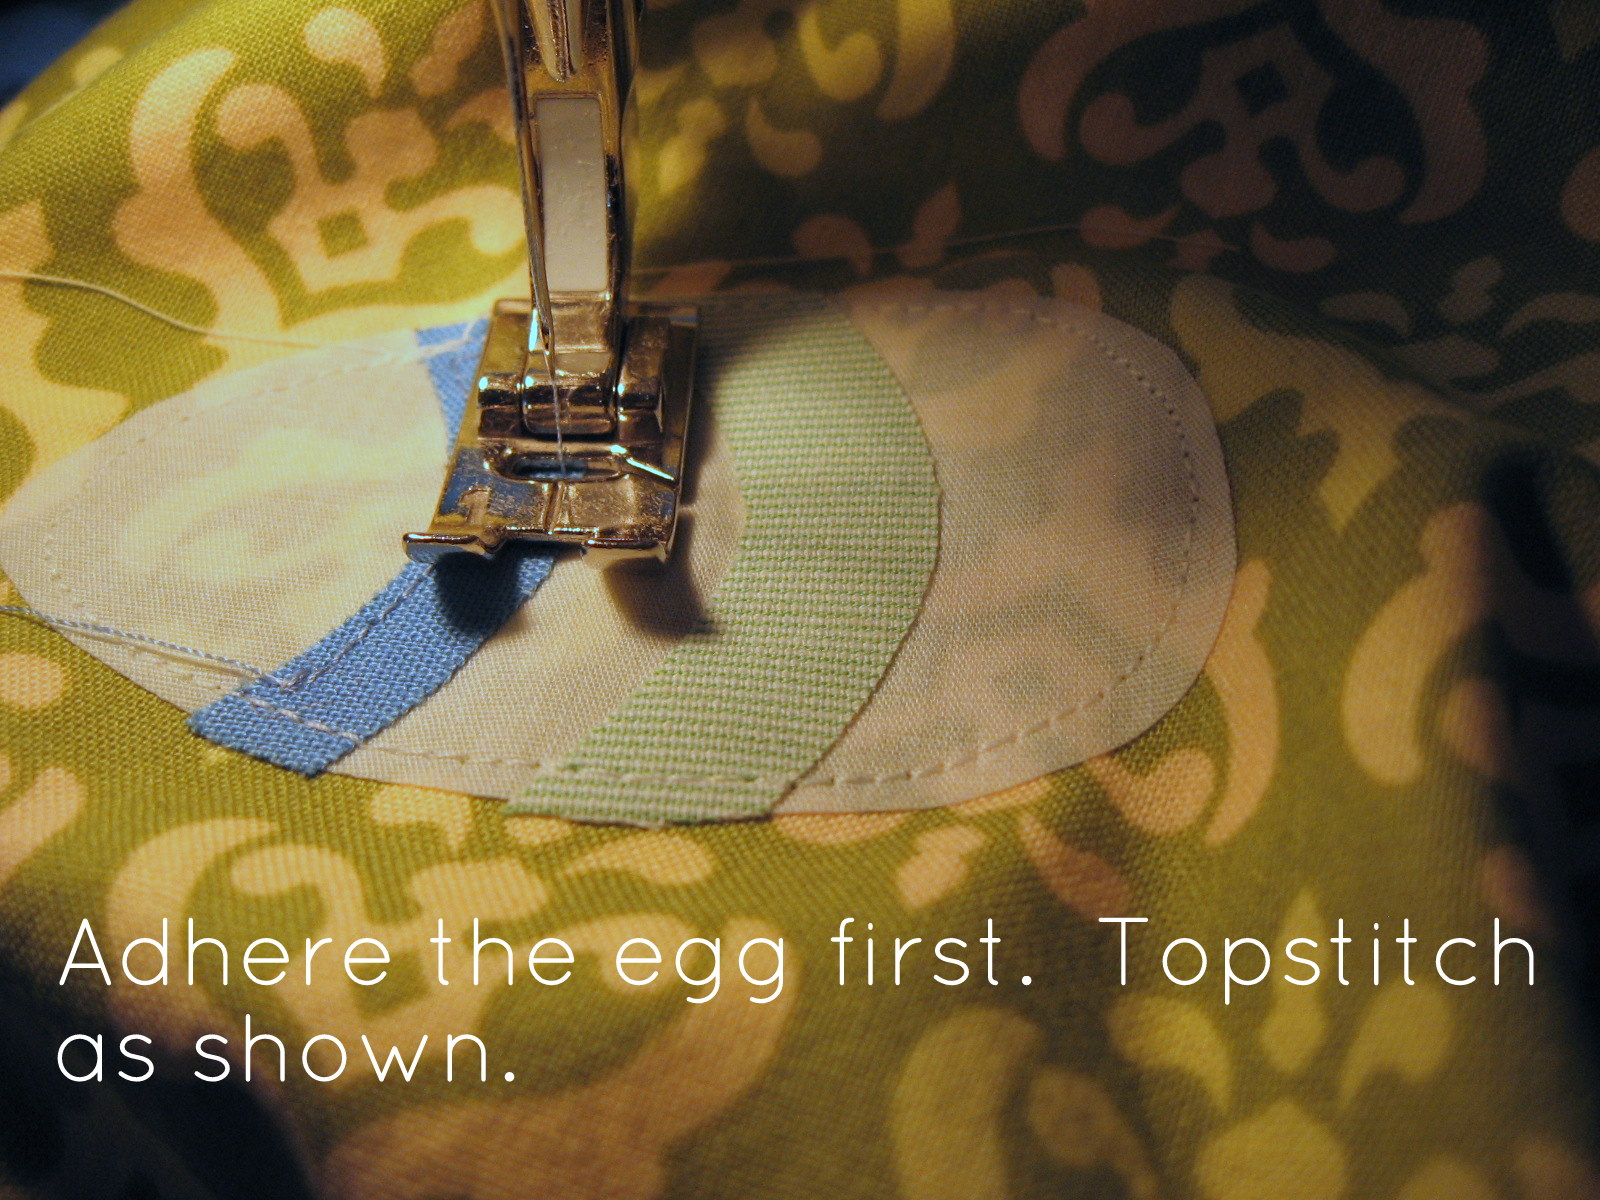
You'll need 4 pieces. An egg shape on white, two stripes, and your monogram.
I found that one layer of white wasn't quite as opaque as I'd like. So, I cut one egg, adhere it to more white fabric. Then, I cut out my final egg shape.
Place your egg where you would like it. I put them off center a little like this.
Trim all your threads, and you're done!
I hope this tutorial is clear. If you have any questions at all, please email me. I love getting feedback. It took me only one afternoon to make four of these baskets. It is a quick project with darling results. Please be sure to share your creations through the
Flickr pool.
Linking up with
Somewhat Simple Easter Edition. and
V & Co.
This tutorial has been featured on
Craft Gossip,
One Pretty Thing,
Fave Crafts Blog, and the
Fave Crafts Easter E Book and
Be Different Act Normal AND
Totally Tutorials! It was also featured as a fave by
V & Co.