I love this guy. I'm not big into Halloween, but this skeleton is based on a decoration my mama made when I was a little girl. I recall hanging the skeleton up and getting excited about trick or treating as a child. When my oldest boy was 2, I called my mom to ask her how she made her skeleton. She sent me a copy of the magazine photo that inspired her, and the paper plates to make him. This was all back in our very poor college days!
Since then, we've had this skeleton. My kids love him, and were so excited to see him when I pulled out our fall decorations. I thought he might be a simple and easy decoration you could whip together, with stuff you probably have on hand. So, I'm sharing my version of this fun activity. My little boy and I made a smaller version together so we could show you how to do it. Making this paper skeleton is a fun and easy activity you can do with your kids, and have memories for years to come.
You will need:
- 18 white paper plates, the cheap kind with fluted edges.
- Templates, which you can find HERE
- Pencil, Permanent Marker, and Scissors
- Paper hole punch
- Jute for tying everything together.
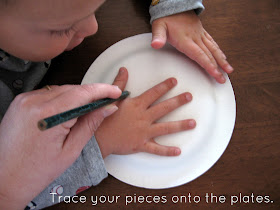
Step two. Cut all your pieces out.
You should have one head, one shoulder/neck piece, one rib piece, one hip, two hands, two feet, and 10 long bones for arms and legs.
Don't forget your skeleton's face. This gives him a little personality.
Step three. Punch holes for joining.
Step four. Cut out approximately 4" pieces of jute, and tie your joints together. I used a square knot.
Using this photo as a guide, tie all the pieces together. You might want to sing along as you go. "The head bone's connected to the neck bone..."
Keep tying, until he's all put together.
Now he's ready to hang on a wall and bring a smile to your child's face.

Thank you, Christie, for reminding me how much fun it is to do crafty things together.
Featured on Craft Gossip, Be Different...Act Normal, and One Pretty Thing!
Linking with Somewhat Simple, A Few of My Favorite Things, Fave Crafts Blog Hop, Creation Corner, and Kojo Designs, and Just a Girl, and Today's Creative Blog.


wow, that's cute!
ReplyDeleteHow original and creative !
ReplyDeleteThat's so cool! I'm definitely making one of these now. Thanks so much for linking up at our blog hop. I hope to see you back next month too :)
ReplyDeleteSOOO cute! This is definitely one to do with the kids...can't wait to try it out! I think I only have red paper plates...guess our's will be "bloody bones"! LOL!
ReplyDeleteSO cute, and I bet they love having their creativity on display!
ReplyDeleteOh, that brings back memories! I remember making these with my Mom when I was little. I totally forgot about it! Thanks for the idea/reminder!!!!!!!!! :)
ReplyDeletePaper plate skeletons are adorable. I wish Halloween was as innocent as it was win we were children.
ReplyDeleteWhat an adorable idea, and look how proud he is! Have fun:@)
ReplyDeleteI LOVE it!!!
ReplyDeleteThat is too cute. I love that kids can help make it too.
ReplyDeleteI will be taking this idea to my daughter's today. She and her husband have 8 children, 19-5 years old. The younger ones will have fun making these.
ReplyDeleteThank you so much for putting this out! Debbie J
This so creative!! My son would love it. Thanks for sharing!
ReplyDeleteKrista
craftinginthecloset.blogspot.com
You've been featured today! Thanks so much for joining the Sunday Showcase Party- I greatly appreciate it. Stop by and grab a featured button if you like. Hope you have a wonderful weekend. - Stephanie Lynn
ReplyDeleteSuch a fun idea - my kids would love this!
ReplyDeleteThis is so great! I bet your kids loved it. Thanks for linking and giving everyone a great Halloween craft with their kids!
ReplyDeleteHow cute!!! Thanks for sharing!!
ReplyDeleteThat's so cute! I'm thinking that maybe I could use foam plates and hang a skeleton "family" on our fence outside?
ReplyDeleteLove it!!! So cute!
ReplyDeleteSuch a cute idea! I know my boys would love to make their own paper plate skeleton!
ReplyDeleteAnd now you get to keep his hand shape of this age.Cool
ReplyDeleteback to look at the "cutie" again!! my girl and I plan to make one this weekend.
ReplyDeleteyou are super creative :) xoxo
Love this, it's so cute! My son is into skeletons this year and I know he'd love to have one of these! Thanks for sharing this AWESOME craft!
ReplyDeleteMy grandson and I did this today and it was the perfect Halloween craft for a 4 year old! Thank you so much for sharing it. I'll be blogging about it with photos tomorrow (10/27), and gave you full credit and a link.
ReplyDeleteHappy Halloween!
Precious!
ReplyDeleteYou are a tutorial genius! I'm so pleased to have founbd your blog.
ReplyDeleteWhat a great idea!
And so cheap too!!
Sarahx
Great tutorial and idea! thanks for sharing.
ReplyDeleteThank you for this tutorial...it's the perfect thing for our unit on the body / skeletal system!
ReplyDeleteI appreciate all the work that went into sharing it.
Blessings to you and yours.
http://www.etsy.com/shop/merchantships
I'm featuring this at Clever Nest, http://www.myclevernest.com/2012/10/11-kid-friendly-halloween-ideas.html
ReplyDeleteCome check it out!
Alyssa
Welcome to a new Linky Party for Kid-Focused Bloggers. Monday Kid Corner is a place to share your kid-friendly activities and crafts. Please join us at www.mondaykidcorner.blogspot.com. See you there!
ReplyDeleteI'm the Editorial Assistant for Fun Family Crafts and I wanted to let you know that we have featured your awesome skeleton! You can see it here:
ReplyDeletehttp://funfamilycrafts.com/paper-plate-skeleton/
If you have other kid-friendly crafts, we'd love it if you would submit them. If you would like to display a featured button on your site, you can grab one from the right side bar of your post above. Thanks for a great project idea!