We had several weddings that we were invited to over Christmas...{I told you I was late}...and I finally got their gifts made and in the mail. I thought a romantic evening at home would be more fun with pretty placemats and napkins, and this is the result. Feel like making some too?
Gather:
- Four 14" x 20" rectangles of canvas. MUST USE CANVAS or heavily interfaced cotton fabric.
- 3" by varied length scraps of red fabric
- Four 15" square pieces of fabric for napkins (I chose linen for one side, red quilting cotton for the other)
- Coordinating thread
- Your sewing gear, including sewing machine, iron and ironing board, scissors, seam ripper, rotary cutter etc.
Step one. Prepare your canvas. Take two of your canvas rectangles. Using your rotary cutter and a long ruler, cut a 4" strip from the left side of the fabric. Then, cut at additional 1.5" strip. Discard the 1.5" strips, and save the 4" and remaining pieces for later.
Step two. Prepare your scrappy fabrics. I chose red scraps from my stash, and cut them each to a width of 3", and varying lengths.
Carefully piece the scraps together along the 3" sides. Use a 1/4" seam.
Once you've pieced together a length just longer than 20", press the seams.
Next, trim the threads and any excess fabric with your ruler and rotary cutter.
Now you'll use your rotary cutter to divide your 3" strip into TWO 1.5" strips.
Step three. Sew the front of the placemat together. Place one scrappy strip of fabric so that it is right sides together with the larger piece of canvas. Sew with a 1/4" seam.
Press the seams toward the canvas, and repeat with the 4" piece of canvas on the other side of the scrappy strip.
Press seams toward canvas again, and then topstitch along each side of your pieced strip at 1/8".
Repeat for second placemat front.
Step four. Add the back, turn and topstitch. Grab the longer canvas back you'd set aside. Match up the back and front, right sides together. Because my math was fuzzy, the back ended up being about 1" longer than the front. Just trim that off.
Using a 3/8" or 1/2" seam, (your preference), sew the placemat together, leaving a 4" wide gap at one side for turning.
With your corners, just sew all the way to the edge as shown. I'm using a different corner technique than I'd shown previously.
Now, don't trim your corners off! I learned from We All Sew that you can just fold the corners in, and then you get tight corners.
It took a couple tries to get this right the first time, but the result was lovely corners:
Once the placemat is turned, press all your edges well, and press the opening so that it matches the seams.
Lastly, topstitch around the perimeter to finish and close the opening. Repeat for second placemat.
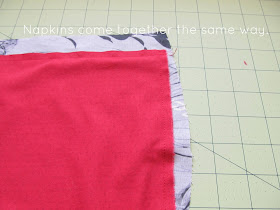
Now, the napkins are made in the same fashion.
I didn't cut my linen fabric to square until after I'd sewn because it was stretchy.
Turn, press, and toptstich, and you have a lovely finished napkin. (Repeat for the second!)
I hope the new brides enjoy their placemat and napkin sets. Now to find the time to make some for my own family!
Sharing with Tatertots and Jello.


These turned out beautiful Chris. I really love have seasonal placemats at our family table (as opposed to a full table cloth). This would be a great way to get through my stash. Excellent instructions.
ReplyDeleteThey are just gorgeous! Beautiful project.
ReplyDeleteKC
Wow--those are really great! I envy the brides! :)
ReplyDeleteThis is a great project - love the pieced strip. I'd love it if you stopped by to link up at Thrifty to Nifty Thursdays at A Jennuine Life. http://www.ajennuinelife.com/2013/02/thrifty-to-nifty-thursdays-6.html
ReplyDeleteSuch a unique placemat! I use placemats everyday in our house, saves on cleanup. But when they get dirty I have yet to find a way to wash them so that they don't shrink! Maybe placemats aren't made to be washed lol
ReplyDeletegreat tutorial. I love the combinaton of colors you chose.
ReplyDeleteMuch fancier than the place mats that I've been making - very pretty.
ReplyDelete