

and funny how I was wearing the same shirt!
Here I am in February 2011.

(It's nice to see the almost 20 lbs lighter version of myself in the first photo!) I have loved my apron, and hope you enjoy making one as a gift this holiday season.
You'll need:
- A pillowcase
- 1/2 yard of coordinating fabric (42-44" wide), plus long scraps for ruffles.
- Matching thread
- Your sewing tools, including a sewing machine, scissors, rotary cutter, ruler and cutting mat, pins, and seam ripper.
- A safety pin
- Helpful...an existing apron to trace the bib from.
First, remove the cuff from the pillowcase. Leave it in tact, but trimming the end seams on each side.

Second, fold the pillowcase in half, and using another apron as a guide, cut a sloping bib top.

Third, remove the seam from the top of the apron, AND

cut slits in side seams to accommodate the apron ties.

{Please note...you don't have to take the pillowcase apart completely...just at the top and the cuff!}
Fourth, cut the neck strap and ties for the apron.

The neck strap should be 2" wide and 20" long. For the ties, cut two 5" wide, the full width of the fabric.

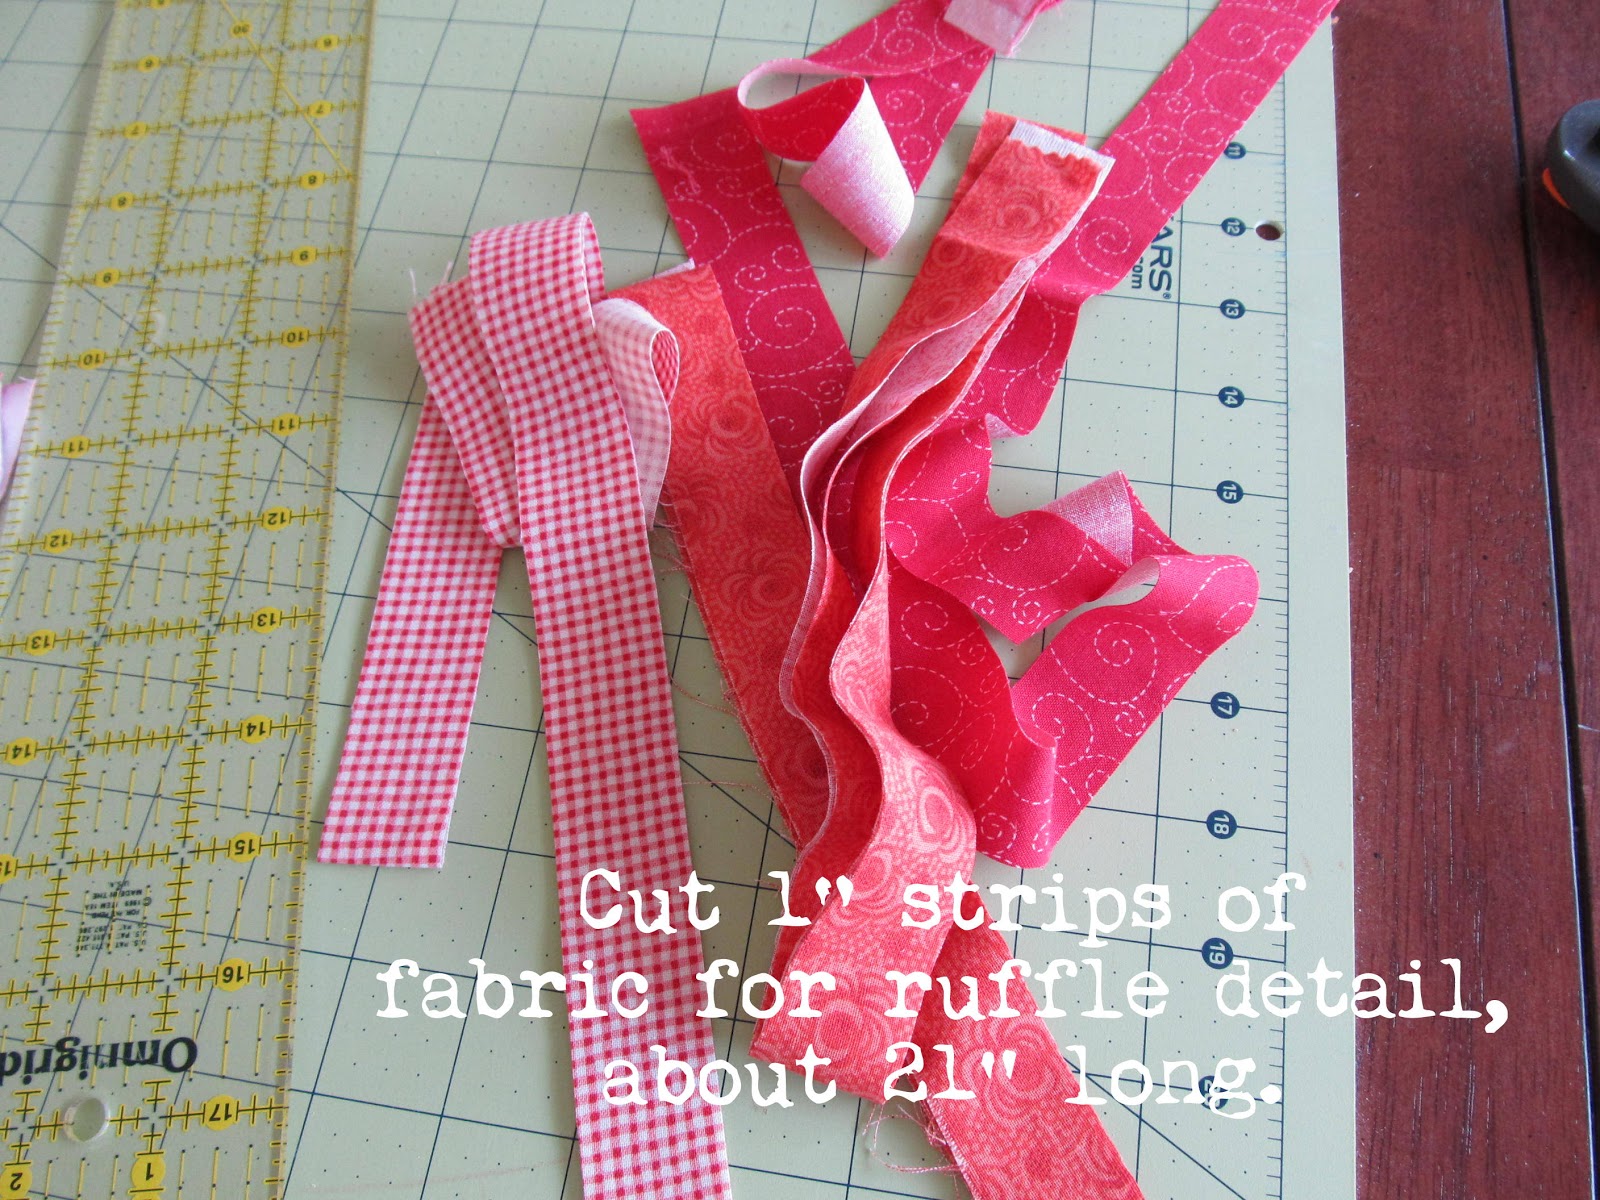
Finally, but 3 1" strips of fabric, about 21" long for the small ruffles at the top.

Step two. Prepare all your pieces.
For the neck strap, fold the strap in half lengthwise, and sew right sides together with a 1/4" seam. This will create a long fabric tube.

Secure a safety pin near the seam, and guide through the tube to turn the fabric right side out.
Press the neck strap flat, with the seam in the middle.

Topstitch each side of the neck strap at 1/8".
For the ties, fold the long strips in half lengthwise, right sides together. On the selvage end, cut the ends in a 45 degree angle.

Sew together, leaving end opposite of diagonal open, with a 1/4" seam.

Be sure to trim your corners. Turn the tie right side out, press, and topstitch at 1/8".

Getting that tight corner is tricky when sewing the topstitch...use your seam ripper to help feed the fabric through your machine.


Next, prepare your fun little ruffles. If you have a serger {lucky!}, you could serge the sides to finish, in my case, I used a small zigzag stitch. Finish both long edges of each ruffle, and then sew a long gathering stitch down the middle.

For tips on gathering, please see Amanda's Sewing 101 post...it has great info. I use the longest stitch I have on my machine, and increase the tension. Once sewn, I pull the bobbin thread a bit more to get the ruffle as tight as I want it.

Pin the ruffle to one side of your pillowcase...not to both. Sew in place. I used a small zigzag stitch for fun.

Last step, prepare the bottom ruffle. Tuck the unfinished edges in, and sew closed on each side.

Sew two rows of long gathering stitches on the cut side of the pillowcase cuff. Pull tight to get to the size of the pillowcase.

Step three. Put it all together!
Pin the neck straps to the front of the apron as shown, about half an inch from the sides.

Do the same thing for each tie, tucking about 1/2" down from the sides. Make sure the ties are tucked between the right sides of the apron.

With right sides of the upper apron together, sew together with a half inch seam. At the sides where the slit was cut, taper down to the sides to make things look nice. Trim your corners.

Trim your corners. Turn apron right side out, and press.

Finally, it's time to add the ruffle at the bottom. You may need to trim the ends a bit to make them even. Press the sides up 1/2".

Carefully tuck the ruffle in between the pressed bottom of the apron.

Carefully pin through all three layers, making adjustments as necessary to make sure everything is in place.
Finally, topstitch the entire apron.

You're done!


Let me know what you think!
Sharing with
Sew Much Ado, My Girlish Whims, Handmade Ginger, Someday Crafts, The Train to Crazy, Freckled Laundry, and Tatertots and Jello.
Featured on Craft Gossip, and One Pretty Thing!
UPDATE: Jami asked about the potholders shown here. I loosely followed this tutorial from the Idea Room...and yes, I used a heat resistant batting layer. :)


16 happy thoughts:
Love those dots, great project. Aprons are one of my favourite sewing projects, especially this time of year. Excellent tutorial!
I love the apron design. And you look fantastic! Congrats on the weight loss - that is not easy.
My inbox ate the email you sent me so I'm leaving a comment here to tell you that I linked out to your tutorial over at Craft Gossip:
http://sewing.craftgossip.com/tutorial-ruffled-pillowcase-apron/2012/11/07/
(Post will go live later this evening.)
Warm regards,
Anne
Ruffles! My favorite! I'm going to have to make one of these. Thanks for your nice comment on my blog :)
-Robyn
Looks great, Chris! You do too. 20 lbs. is quite a success! I have 24 lbs. that I'd love to kick to the wind. Have you shared the pot holder tutorial yet? (Just wondering what you used for the inside padding. Batting or something thermal/heat specific?) Love this idea for gifts. Would love to make matching sets for my sister, sisters-in-law, and their little girls.
How did you know I needed a new apron. You are the best. So happy that you are back from all that new house building, home painting stuff. Missed you in Blogland!
You are so clever! Thanks for the excellent tutorial ... now to find a pretty pillowcase.
That is so cute and clever! Thanks for the tutorial. Stopping by from The Train to Crazy.
I can't get over how clever you are! Your tutorial is so clear. I appreciate all the work you did to be able to show us what you did!
congratulations on your weight loss!
Also, could you put a "Pin it" logo on your website so we can post your ideas on Pinterest?
Thanks, Mary
@Mary DeckerMary, I just haven't taken the time to figure out how to add a pin it button...for now, you can follow my "stuff I'm up to" board on my pinterest account and pin whatever you'd like. Here's the link:
pinterest.com/somecreativity/stuff-i-ve-been-doing
I just picked up a funky vintage pillow case at my local thrift store. I had though about making an apron and this is the perfect pattern.
Adorable. I love all the ruffles and the fabric is so cheerful.
How cute!!! I love them! I just made some pajama bottoms with pillowcases and posted a tutorial on my new blog... I must say though, your tutorial making AND sewing skills are much more professional than mine! :o) Here is a link to my tutorial if you're interested: http://mynewduds.blogspot.com/2012/11/new-up-cycled-pajamas-and-tutorial.html
Tania
I love your tutorials, Chris. They're so clear and make your project look really do-able!
This is gorgeous(and so are you!).
Sarahx
I agree with the others. You look wonderful!
I have never made an apron, but your tutorial would allow me to do that, wouldn't it? I love the latest polkadot one. What is it about polkadots, eh?
Upcycling is my fav. This is amust try, along with 20 pounds of weight loss id take that tooCongratulations to u, losing weight is hard work.
Post a Comment
How sweet of you to stop by. Kind words are always welcome.