

We found this fun bar at Ikea for the laundry room. We also got the cool hooks, but didn't splurge on the accessories to hang on them.

I needed something fun to hold stuff. I was making a fruit salad with some big cans of peaches and it hit me...the cans would be perfect. They just needed some prettying up.
In this tutorial, I'm going to show you a simple way to line a can with fabric. You can embellish the outside however you wish. I used spray paint, decoupage, and even jute. To line the cans, you'll need:

- large scraps of fabric
- matching thread
- sewing tools, including sewing machine
- iron and ironing board
- hot glue gun
Step one. Cut out your fabric pieces. You'll need a bottom and a side piece. For the bottom, trace the bottom of the can and cut that exact size.

For the sides, you'll need a rectangle. Measure the outer diameter of the can, add 0.25 inches for the width. To make this simple, I actually marked a starting point, and then rolled the can until I came back to the starting point, and then added a quarter inch beyond my mark.

Measure the height of the can, and add 1 inch. This will give you a rectangle.

Step two. Take your rectangle and match the short sides together to make a cylinder shape. Right sides of the fabric together, sew with a 1/2" seam.

Step three. Pin the circle piece to the cylinder, right sides together.
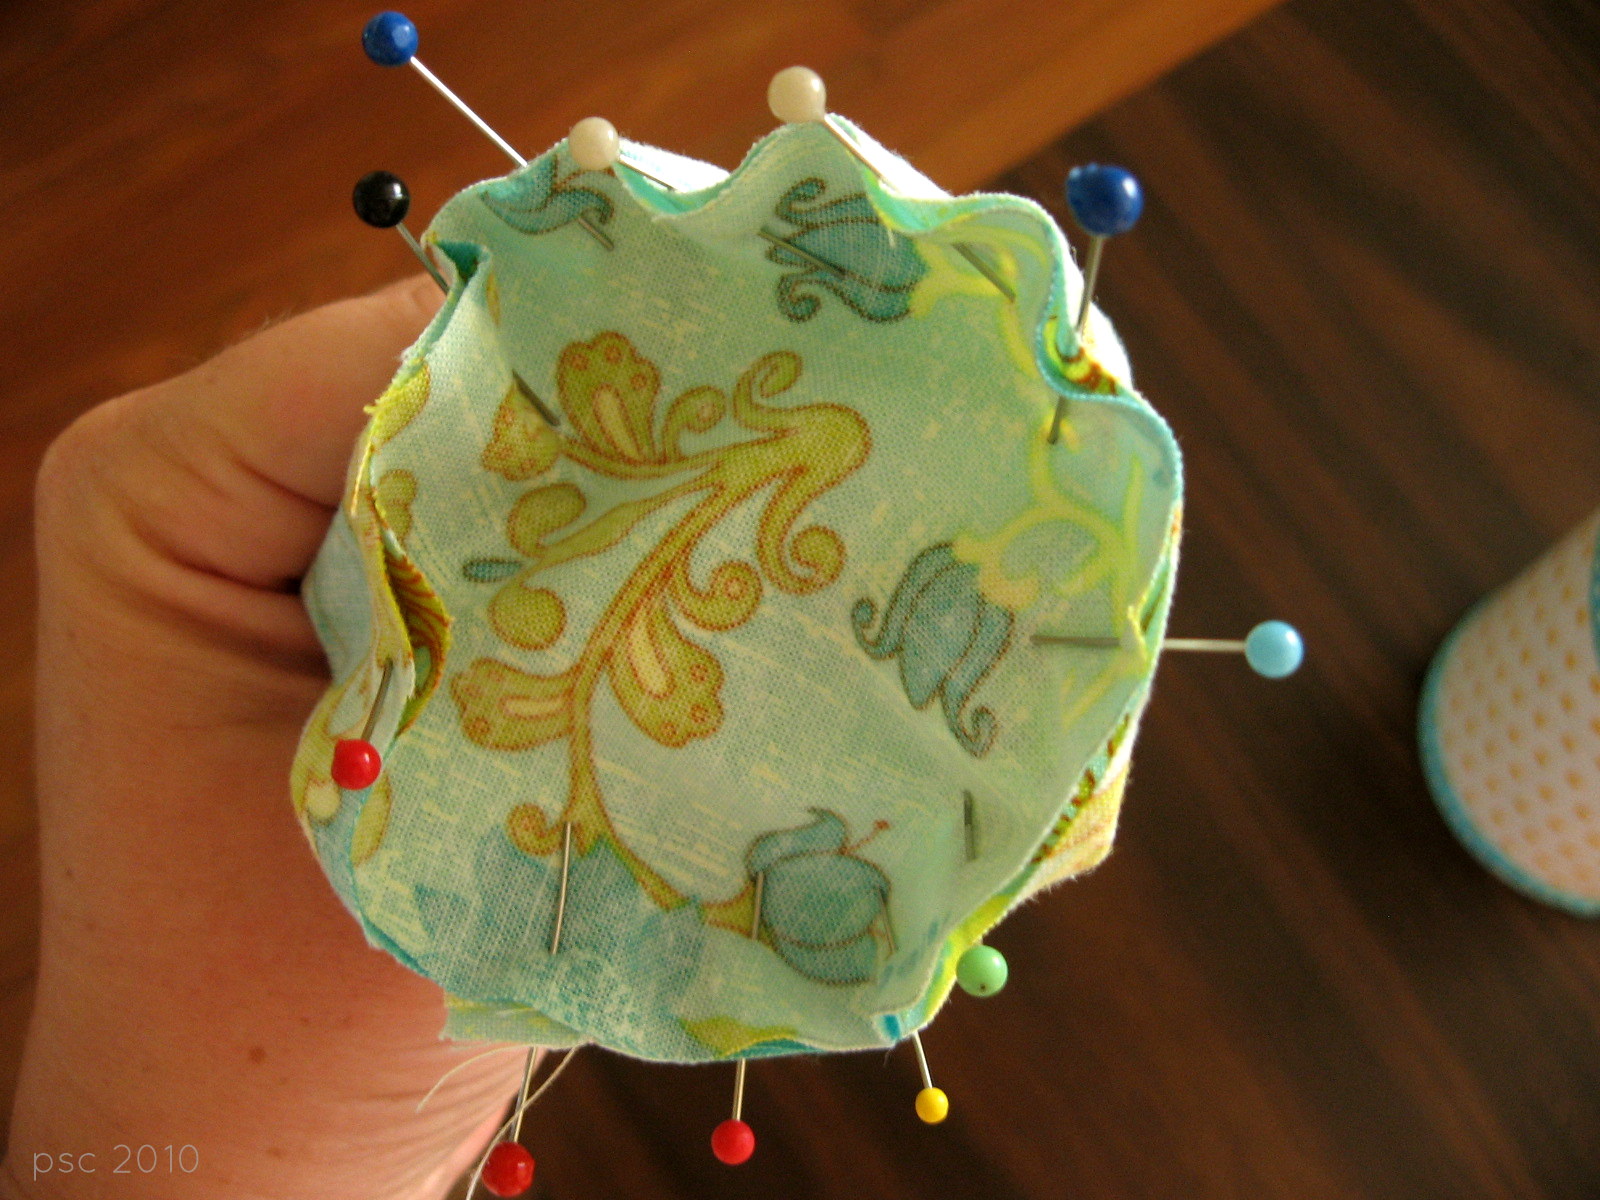
Sew with a 0.25" seam.


Step four. Measure down 0.75 inches from top of cylinder, and iron down.


Step five. Tuck cylinder into can.

Then use your hot glue gun and glue the lining in place.

Project complete! Now, you can take this simple idea and personalize it in countless ways, really.
In my example, you see the decoupaged can with grosgrain ribbon trim. The fun part with the lining, is you completely cover up the hole in the can.

I also spray painted cans. One tip I figured out, use a rubber glove to make sure you don't paint your arms.

All dolled up:

The best part, using my method, you can line any size can, because it is based on the can dimensions! What kinds of applications can you think of for a fabric lined can? I'd love to see what you come up with.
Here's my happy laundry room bar.

Featured on Craft Gossip, One Pretty Thing, Totally Tutorials, and Cut out and Keep!
Linked up to: Creation Corner, Kojo Designs, Tatertots and Jello, Along for the Ride, Under the Table and Dreaming, Skip to My Lou, and Blue Cricket Design.
I love the lime green one - pretty and happy!!
ReplyDeleteI've been meaning to do something similar for the girls except add a layer that pulls over the top of the can and pockets for pencils or crayons.
I really must do it!!
That's a great idea to reuse cans. I like it because it's much more durable than the cardboard ones made out of paper tubes. I always thought those would last about a minute in my house. But this is great because you can cover up the sharp edges at the top of the can with fabric. And it's a perfect size for a pencil holder. Going on my "save" list.
ReplyDeleteSomehow I just knew these were going to be yours. That cracks me up that I was right! I just LOOOOVE them. I am seriously going to do this. It would be fun to do this and then put a bag of candy or something in the can and then give as a birthday present or something. Even to kids or adults. (plus I love them in your laundry room too.) Maybe it is what I need to do in my sewing area for all my nic nacs. Thank you for linking them up! And for showing us a tutorial. Glad it is friday. Hope you have a good one. :)
ReplyDeleteThis so cute! I'll have to try this. Stopping by from Friday Fun Finds!
ReplyDeleteLOVE! I am so copying this for my craft room. I love upcycling!
ReplyDeleteLove that you even thought to do this - it's practical AND pretty and I love that!
ReplyDeleteSuper cool idea Chris!!
ReplyDeleteThis is a darling idea!
ReplyDeleteHow did you attach the hooks to these cuties?
ReplyDeleteAnonymous,
ReplyDeleteI punched holes in the cans with a nail and hammer, and enlarged them with a screwdriver...not the safest thing in the world, hence not recommended. I covered the sharp edges by gluing felt over them. The nicest part about lining the cans with fabric is that the holes are not visible at all.
Thanks for the question.
very creative idea and with a practical approach, they can be used in so many ways, I am gonna make them soon, thanks for sharing
ReplyDeletehttp://craftaworld.blogspot.com
you can check me there..Love
These are so cute Chris! I love the fabric.
ReplyDeleteThese are gorgeous!! I love the idea. Thanks so much for sharing and linking. Great idea for recycling. I also love the idea Tasha had to use them for gifts. The would make great containers to hold party favours too!
ReplyDeletewww.veronicahurly.blogspot.com (aka : pixels and paperie)
Such a great idea! I have a bunch of cans I've been saving to create with..I'll have to give this one a try!
ReplyDeleteThese are really cute Chris!
ReplyDeleteGreat job! You have a very cute blog here. I'm visiting from Made bY you Monday! I'm a follower! Stop by Sassy Sites when you get a chance! xoxo
ReplyDeleteMarni @ Sassy Sites!
I have that Ikea bar and hooks too. I love this idea. If you didn't line the inside, I bet you could even plant some herbs in the cans. That would be cute.
ReplyDeleteWhat a great idea. I'm not much of a sewer but think I'll give this a try.
ReplyDeleteformula containers would work well too--no sharp edges to poke through the fabric.
ReplyDeleteooh..fantastic idea!
ReplyDeleteI will use an eyelet to cover the hole and paint the eyelet with Sharpie or acrylic paint to camouflage it.
You are a genius! This is a really awesome idea. The hooks were such a smart idea to splurge on, and I bet some scrappy/quilt style bags hanging from them, along with the awesome cans would be great.
ReplyDeleteMy boyfriend and I are always losing our clothing accessories. A Can would be perfect for Ties, Cufflinks and Tie tacks for him. And a coordinating Bag we could put dress socks in (so that Bender Oak the Dog won't steal any of the ones we've been tying onto the coat hangers for specific outfits!)..
Thanks for the great Tutorial!
UH MAZE ING! I'm so happy I found this! and great tutorial too.
ReplyDelete-dani
These are such a good idea and the sewing actually looks like something I could do.... lol. Thanks for sharing the great idea!
ReplyDeletemi piace ,molto bello lili
ReplyDeleteHello, found you from pinterest. I LOVE this idea. I've been looking for a way to store crayons, pencils, glue sticks, markers, etc in cans in my kids' playroom. But couldn't figure out how to make the cans safe -- covering up with a fabric insert is a great idea. Thanks for sharing this.
ReplyDelete